Quick answer
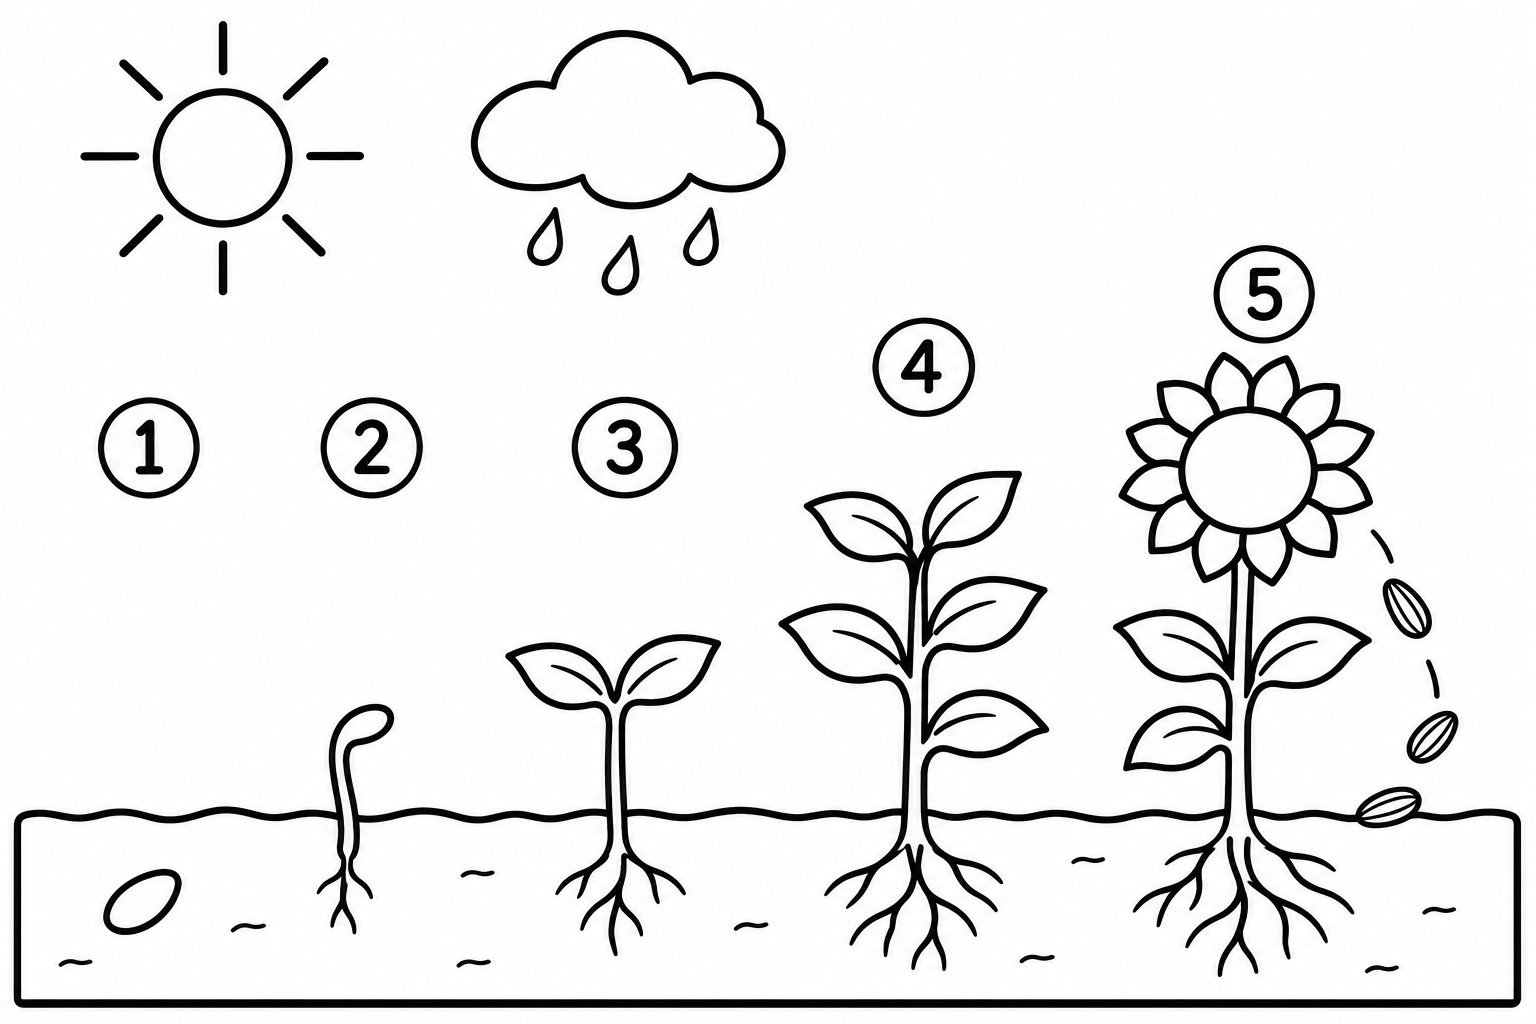
Draw a strip of soil at the bottom of the page and place 5 stages on it from left to right: a seed underground, germination (a small root going down and a stem going up), a seedling with two leaves, a taller plant with many leaves, then a big flower dropping new seeds. Add a sun, raindrops and arrows numbered 1 to 5.
⬇️ Download the full-size example drawing for printing (PNG)
The plant life cycle, simply
Every plant starts as a small sleeping seed. When the seed finds water and warmth it wakes up: a root comes out heading down to drink, and a stem heads up looking for light (germination). The first two leaves appear and it is called a seedling; then the leaves and stem grow until it becomes an adult plant that makes its own food from sunlight. Finally the flower opens and makes new seeds that fall into the soil — and the story starts again.
Materials
A4 paper in landscape, a pencil, an eraser, a thin black pen, colored pencils (brown, light and dark green, yellow, orange, blue).
Drawing steps
1. Soil and sky: draw a horizontal line in the lower third and a second line 3 cm below it — the space between them is the soil. Draw a sun in one top corner and a small cloud with drops in the other. 2. Stage 1 — the seed: inside the soil at the far left draw a small oval with a pointed end (like an almond). 3. Stage 2 — germination: next to it draw the same seed with a short wavy line going down (the root) and a line going up just past the soil surface (the stem) with a very small leaf. 4. Stage 3 — the seedling: a longer stem above the soil with two opposite leaves (each a pointed oval) and longer roots under the soil with small branches. 5. Stage 4 — the adult plant: a much taller stem, 4 to 6 alternating leaves on both sides, and a closed bud at the top (a drop shape). 6. Stage 5 — flower and seeds: the same plant with a big flower at the top: a circle in the middle with repeated petals around it. Draw 3 small seeds falling from the flower toward the soil and an arrow going back from the seeds to stage 1. 7. Arrows and numbers: short arrows between the stages and numbers 1 to 5 inside small circles above each stage.
Coloring
Soil in brown, roots in light brown, stems and leaves in green (lighter for the seedling, darker for the adult plant), the flower in yellow and orange (like a sunflower), and the sky left white with a yellow sun and a light-blue cloud.
Ideas for homework
- Under the strip, write what a plant needs to grow: water, light, air, soil.
- Draw a dashed line from the sun to the leaves and write "light".
- A real experiment: put a bean in damp cotton and draw it every two days — the best life-cycle drawing is the one a child sees with their own eyes.
FAQ
How many stages are enough for grade 1?
Three stages: seed, seedling, plant with a flower.
Should I draw the roots under the soil?
Yes; the roots are what makes it a life-cycle drawing rather than an ordinary flower drawing, and teachers look for them.
Which plant should I choose?
A sunflower or a bean; both have big clear seeds and simple leaf shapes.
From school drawings to a little artist
A school drawing is often the first place a child discovers that a pencil can explain what words cannot. If your child enjoyed this exercise, the kids drawing and coloring course has 84 recorded lessons in Arabic that start from holding the pencil and basic shapes and reach complete paintings in pastels and colored pencils, with a free first lesson and a 7-day money-back guarantee.